Getting started with SlingStudio is a matter of knowing where things are. Here's a step-by-step guide to help you create your first project using SlingStudio Console for Mac.
(Are you working with an Apple iPad? If you like, you can use SlingStudio Console for iPad. Check the link at the bottom of this article.)
Before you get started: Make sure that you have hooked up your SlingStudio properly and set up the cameras or smartphones that you want to use as video sources. For more information, click the link at the bottom of this page to see How do I set up my SlingStudio?
Also be sure that you've set up any other equipment that you want to use (audio equipment, external monitor, and so on) as well as any Wi-Fi or network cable needed for streaming video.
- Launch the SlingStudio Console on your Mac.
Make sure that your computer is connected to the SlingStudio hotspot (SlingStudio Console walks you through that process if it isn't). - Let's create a new project:
- From the Project menu, choose Create Project.
The project window appears. - Click NEW PROJECT.
The Create Project window appears.
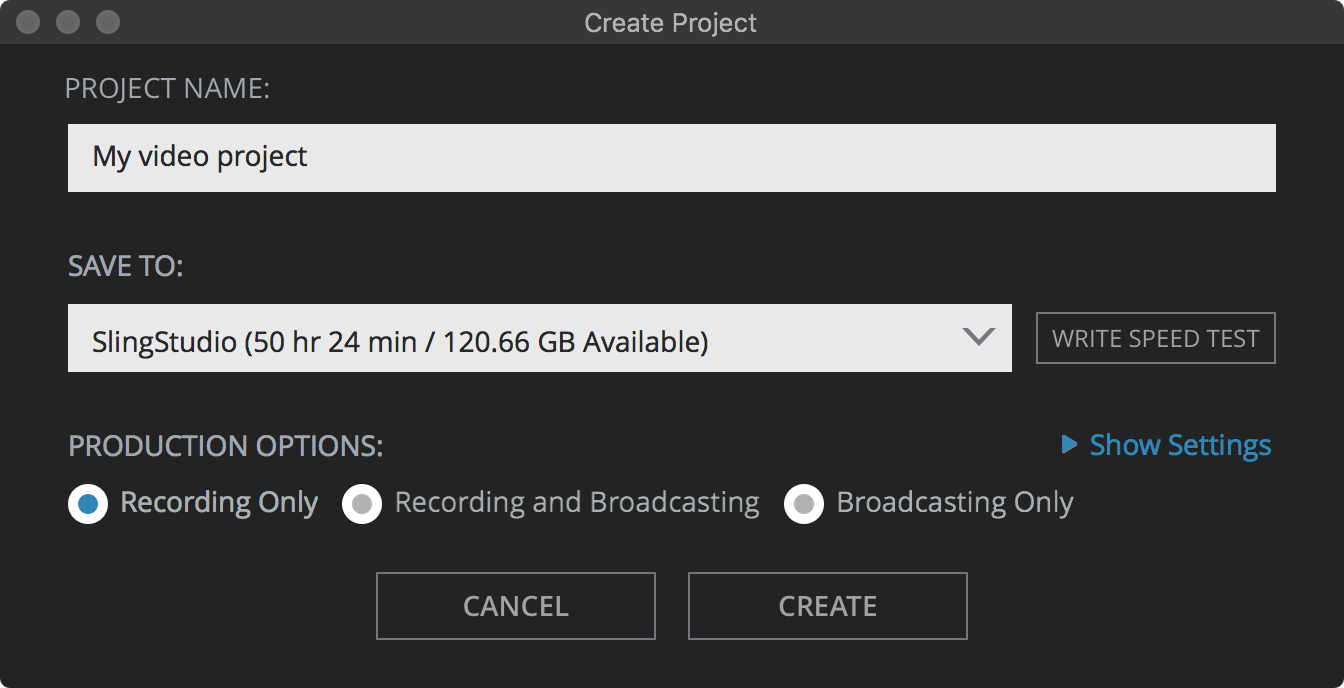
- Enter a project name in the PROJECT NAME field.
- Look at the SAVE TO field and confirm that the project is going to be saved to the correct destination.
- If you just want to get started quickly, then choose the PRODUCTION OPTIONS that you want, and then click CREATE.
- If you want to choose more options, then you can click Show Settings:
- Choose the Recording Options that you want. These are the video streams that are included in the production's video folder on your storage media:
- Program is your production's finished video.
- Video sources and Line-In Audio tells SlingStudio to record separate streams for all of your video sources. There is also a stream for audio line-in (audio only) recording if you have audio coming through the SlingStudio audio line input.
- Quad-View is an encoded multi-view stream that includes all sources, with synchronized audio, encoded into one stream for later decoding in post-production. It can be a useful source for post-production or video assist.
- From the Video Production menu, choose a resolution/frame rate setting. Think of this as a choice of the number of dots that make up the picture (resolution) and the number of frames per second (frame rate) that are recorded.
Remember: The higher the resolution and/or frame rate that you choose, the better the video quality … but also the more disk space the production can take per minute of runtime.
SlingStudio calculates the recording time available on your storage media based on your choice. (Not enough storage space? Consider reducing the resolution and/or frame rate.) - Video Sources and Program Output Bit rate allows you to choose a video bit rate (the amount of data per second that SlingStudio uses to store your video/audio). Again, as with resolution/frame rate, higher quality means more disk space is required. The bit rate range available to you depends on your Video Production setting. Check to see how much run time SlingStudio has calculated that you have available based on your quality choices.
- Click CREATE when you're ready.
Your new project opens.
- Spend a moment reviewing the controls that are in SlingStudio Console for Mac:
- You'll spend most of your time working with the Preview, Program, and Video Sources windows:
- Preview displays the video source that you've chosen to be "next up" for your program.
- Program displays the currently-active video source.
- Preview to Program is the button that you use to send the Preview image to Program.
- Video Sources display the HDMI cameras, SlingStudio CameraLink devices, and other video sources that you have available for selection.
Tip: Want to rearrange the order of your video source thumbnail images? Just tap and drag (SlingStudio Console for iPad) or click and drag (SlingStudio Console for Mac) the video source thumbnails into the order that you'd like.
- Along the lower-right corner, you see these controls and indicators:
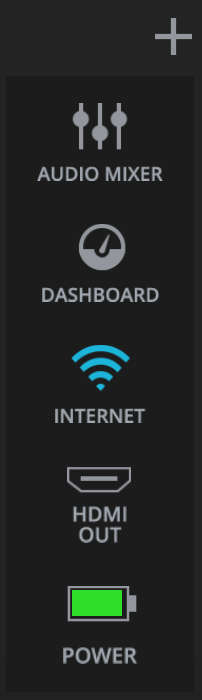
- Audio Mixer (mix audio from all available sources)
- Dashboard (one-stop shop for network quality, remaining disk space, battery life, and more)
- Internet (create and review Internet connections)
- HDMI Out (set resolution and color space for the HDMI Out port)
- Power (review status of SlingStudio battery, if installed)
TIP: You can click the + button to select the controls that you want.
- Choose video sources for Preview by clicking on them.
- Send Preview images to Program by clicking Preview to Program. The control next to it adjusts the transition from one video source to another.
- Want to add graphics, lower thirds, onscreen text, and so on? Take a look at the GRAPHICS section at the bottom of the Console window.
Click the + at the far right corner of the GRAPHICS section to add the effect that you'd like.
To change project settings: Choose Project Settings from the Project menu.
To begin recording your project: Click the REC button in the upper-right corner of the Console window.
You see a message that your recording is beginning, and the timer begins timing your recording.
You're on your way!
IMPORTANT: ALWAYS CLOSE YOUR PROJECT before switching off the SlingStudio, or before ejecting the SD card onto which you've stored your project.

