SlingStudio does not support 4K video directly; the highest video resolution that it works with internally is 1080p.
However, you can still use 4K video with SlingStudio productions that you import into Apple Final Cut Pro X. That's because the SlingStudio Converter for Final Cut Pro X supports a 4K video "swap out" technology. It works this way:
- Connect your 4K camera to SlingStudio and create a production.
- Make sure your camera is outputting 1080p video to SlingStudio (either directly via cable into the SlingStudio HDMI-IN port or with a SlingStudio CameraLink device) while your camera is natively recording 4K or higher quality video.
SlingStudio saves the production internally as 1080p video, but your 4K camera simultaneously records video in 4K format onto its designated storage drive. - Use the SlingStudio Converter for Apple Final Cut Pro X to import your SlingStudio production into a Final Cut Pro X project file.
- During this import, you can provide the file locations for your SlingStudio project, as well as the corresponding 4K files, and easily swap the 1080p video for the 4K video in Apple Final Cut Pro X.
The audio recording (which is common between the two video files) serves as the synchronization key. - Your production now uses the 4K video files.
Getting started
What do you need?
- A Mac computer with macOS 10.12 (Sierra) or newer
- Apple Final Cut Pro X
- SlingStudio Converter for Apple Final Cut Pro X
- A SlingStudio production created using SlingStudio Console version 1.3.XX or higher (released November 2017) This production should have been created with a 4K video camera. (You can also use a camera that outputs an even higher resolution, or a higher bit rate, or any video made with a higher-quality video codec such as ProRes or HEVC.)
The 4K (or higher) video files that correspond with the video used in the SlingStudio project need to be available to the SlingStudio Converter application, so copy them as needed (or mount the necessary volume to your Mac).
Note: The SlingStudio Converter for Apple Final Cut Pro X runs as an independent application. It is best to convert your SlingStudio project to Apple Final Cut Pro X format before launching the Apple Final Cut Pro X application.
Procedure:
- Download and install the SlingStudio Converter for Apple Final Cut Pro X. It's likely that you'll keep it in your Applications folder.
- Launch the SlingStudio Converter.
- Click BROWSE to select a SlingStudio project.
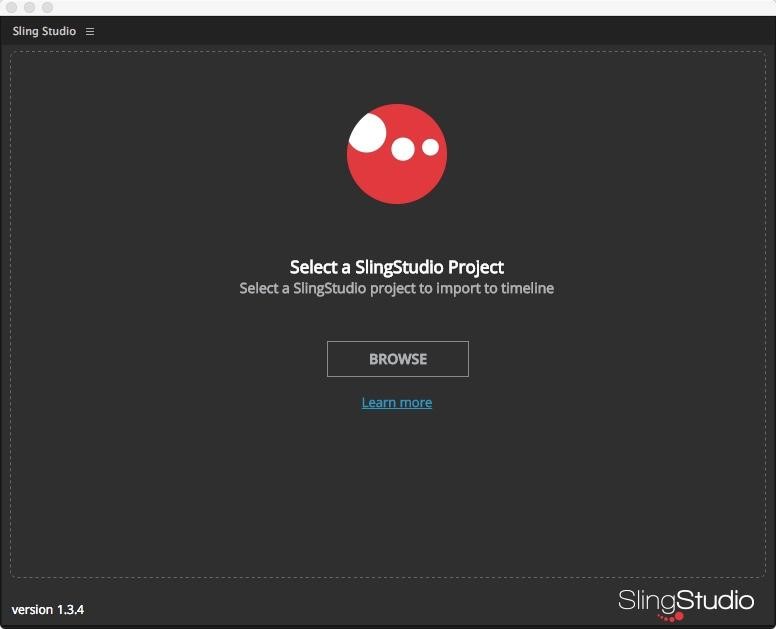
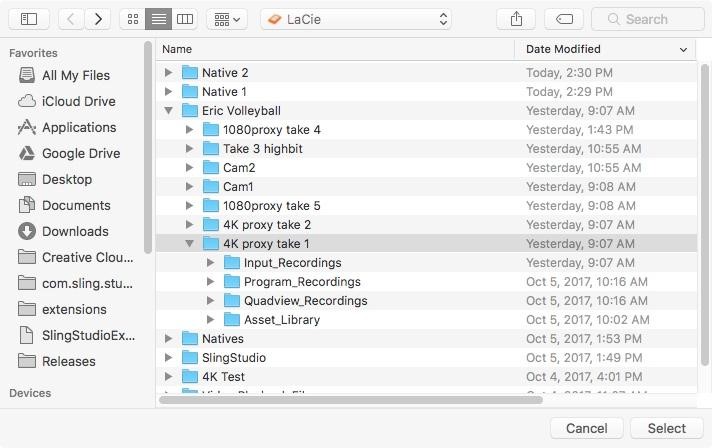
- Navigate to your SlingStudio project storage location.
- Select the Project folder for the project you wish to import, and then click Convert.
IMPORTANT: The SlingStudio project folder must remain intact. You can move it to another storage location but you must make sure that the files and folders inside your project folder are not disturbed or re-named.
- On the next screen, there are two choices:
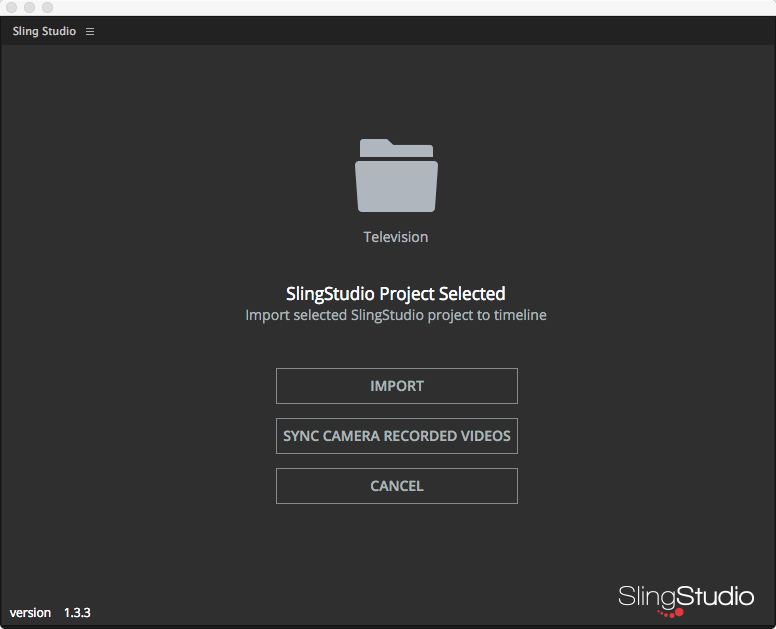
- If you chose to have the video is imported, you see this dialog box:
- If you chose to sync videos, then you see this dialog box:

- Select the videos that you want to work with:
- Under SlingStudio Input Recordings, you see your original SlingStudio files (the ones that you want to swap out).
- Under Camera Recorded Videos, choose the files that you'd like to substitute in.
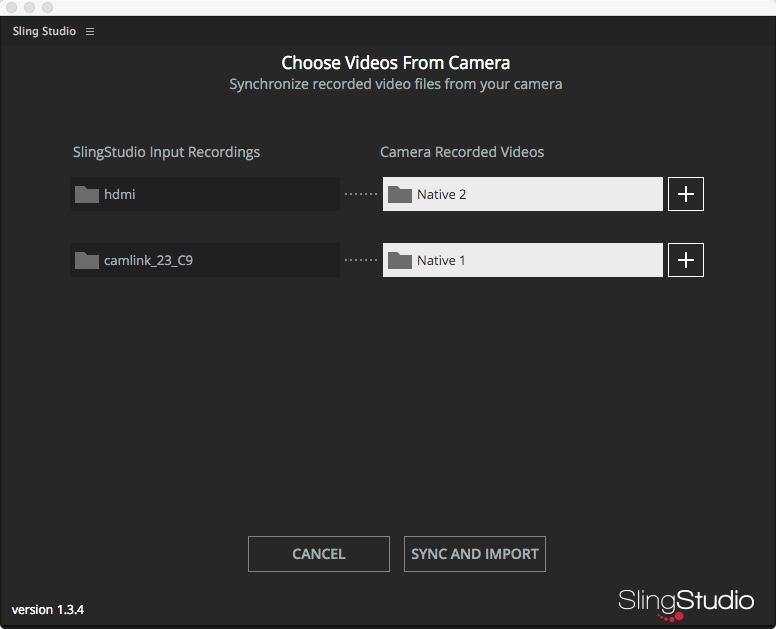
- Click SYNC AND IMPORT.
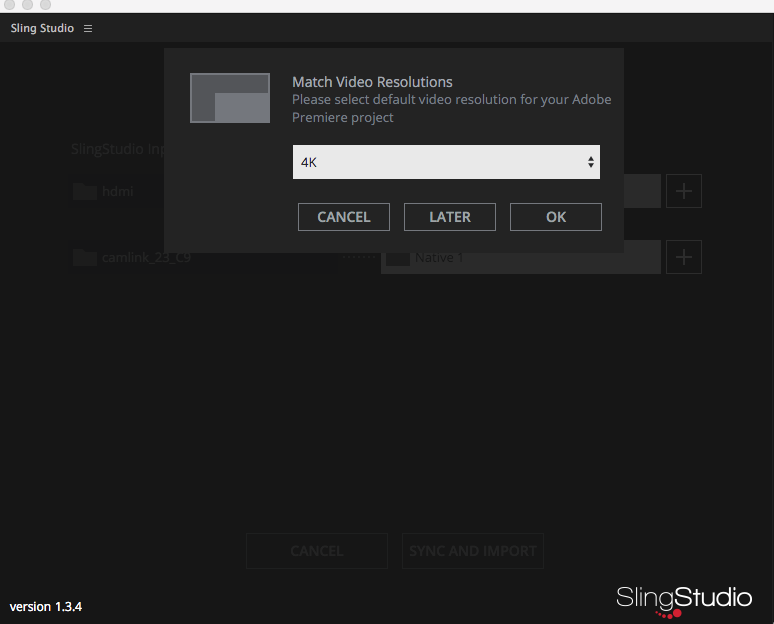
The Match Video Resolutions dialog box appears. - Choose the video resolution that you want for your project. In the example here, 2160p60 (4K) is chosen.
- Click OK.
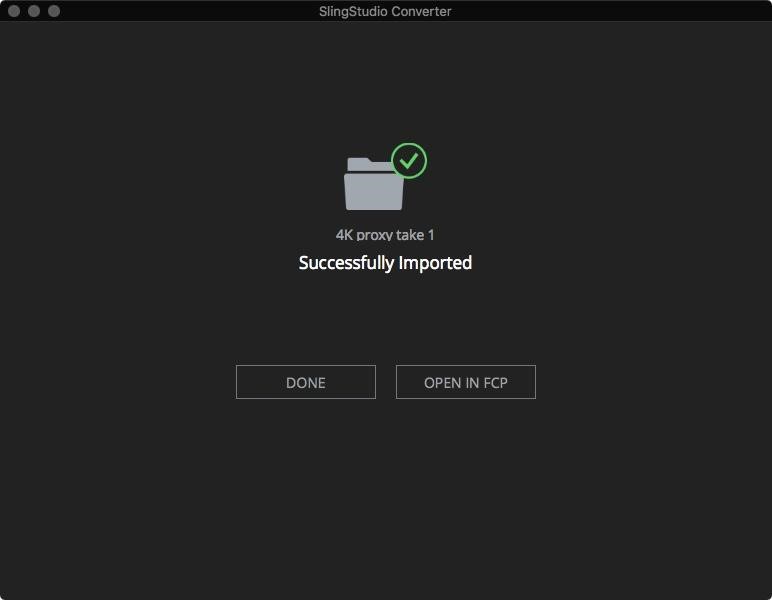
All imported files will be synchronized. This could take some time, so please be patient. - When the import is done, you see this dialog box:
The FCPXML file has been written into the project folder for the project you selected. - To make things easiest: click Open in FCP (Final Cut Pro).
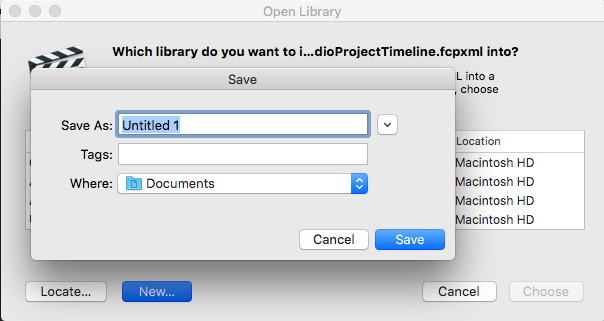
This launches Apple Final Cut Pro X and begins the import process. - Apple Final Cut Pro X launches. When prompted, select the library into which you want to import your files/project.
Important note: Apple Final Cut Pro X is going to copy video files from your storage source into the Final Cut Library. Make sure that you have adequate storage in the location that your new or existing library is located.
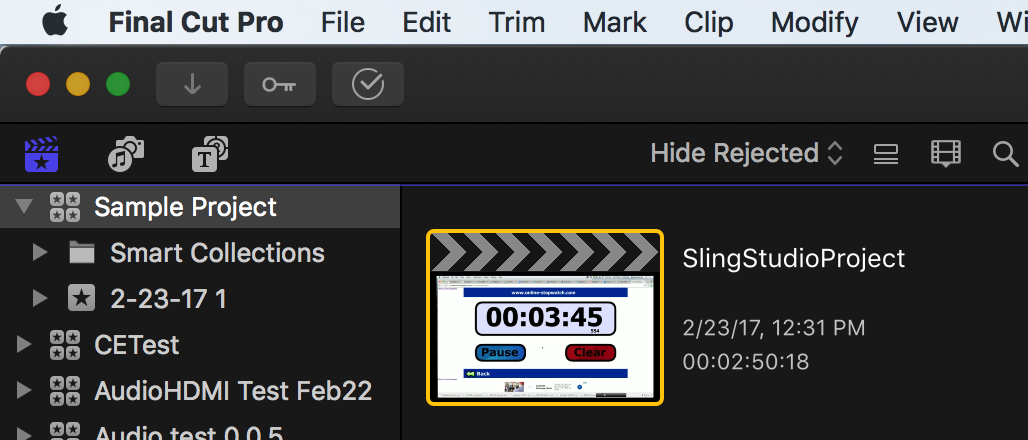
- Once import is complete, your new project is in the library you selected (or created).
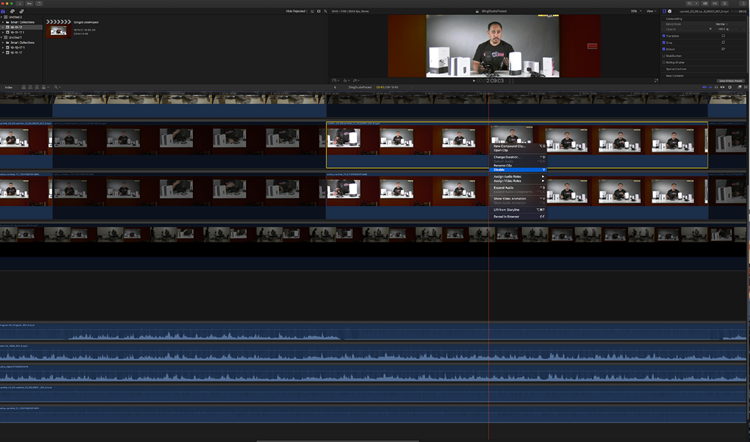
- Double-click the project thumbnail to open it into the timeline.
- The newly loaded timeline replicates all of the editing actions you performed with SlingStudio. From here you can remove sections, edit cuts, add footage, and use all of the power of Apple Final Cut Pro X.
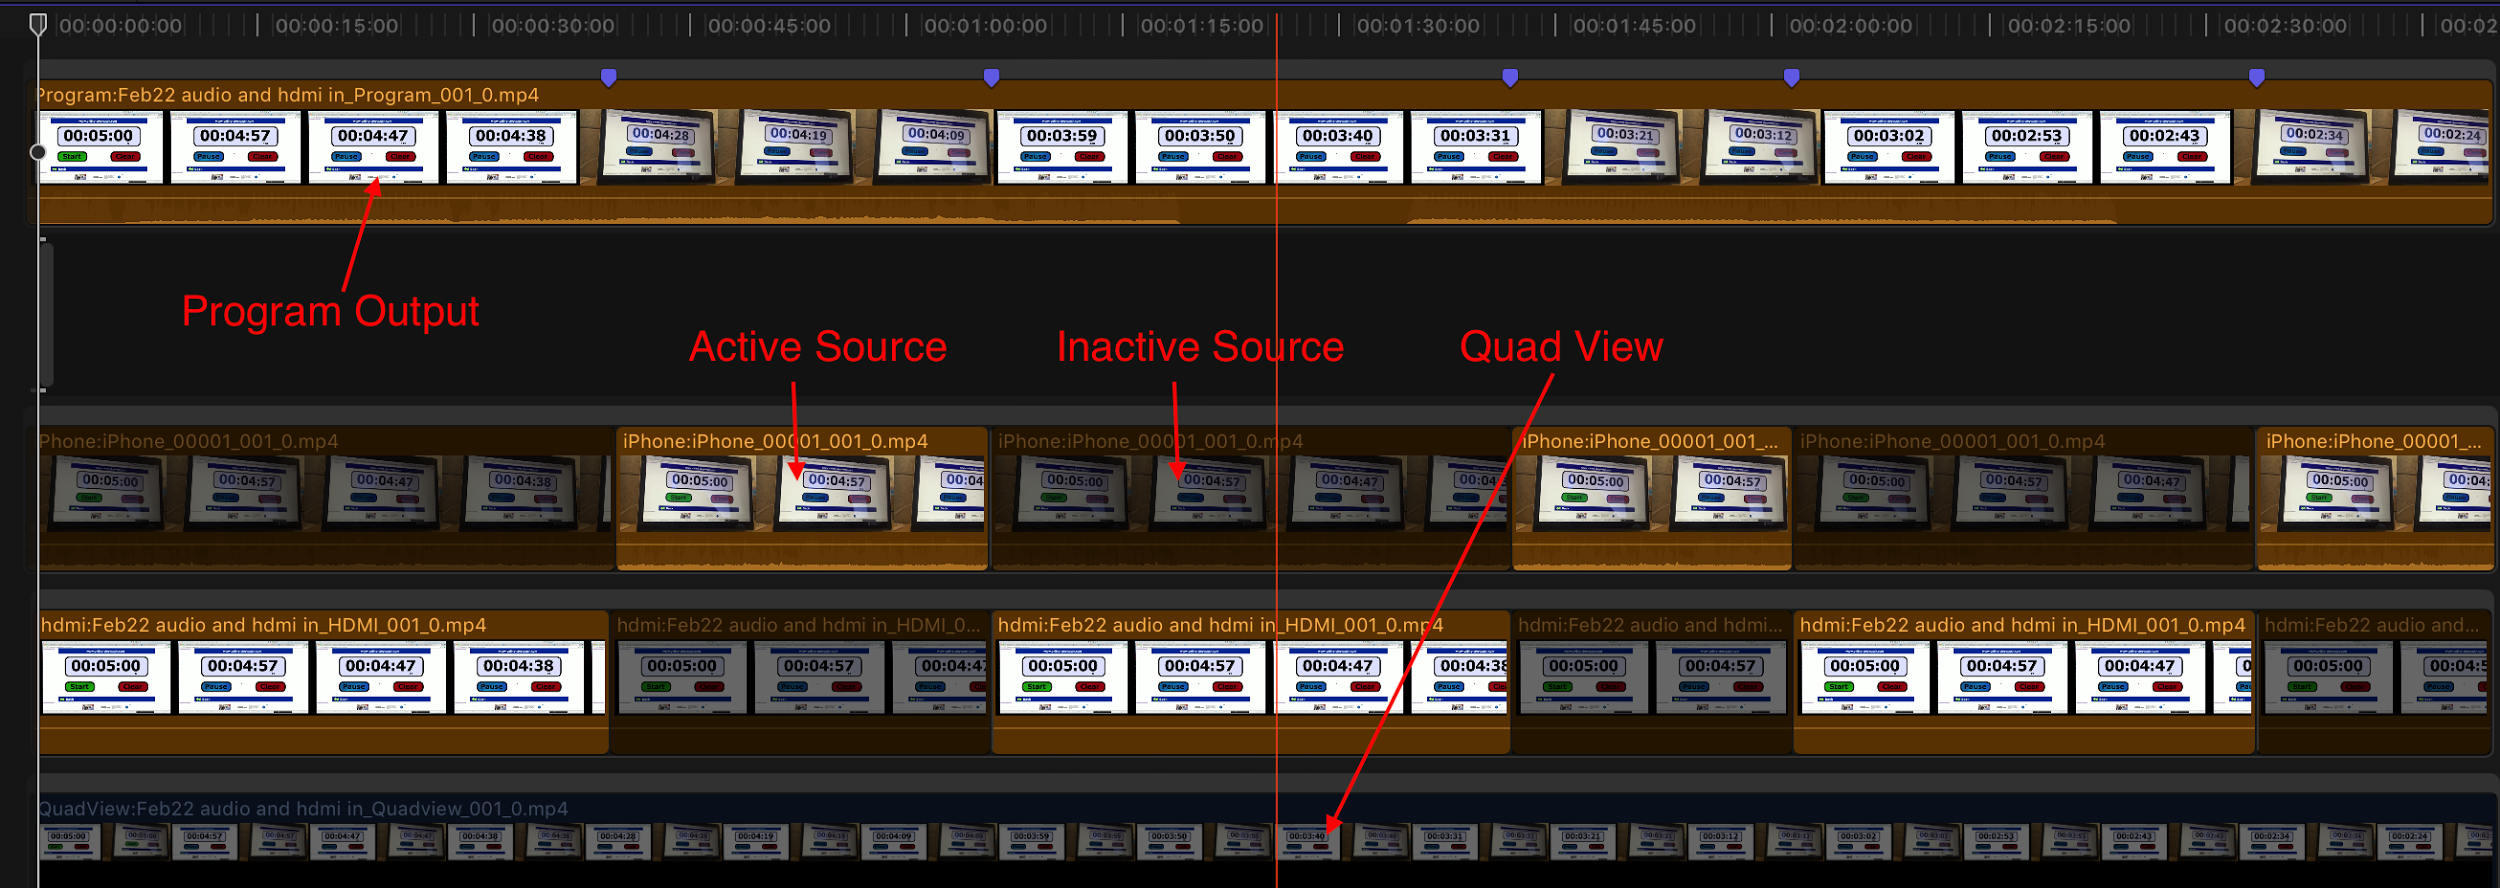
- To substitute the native sources for any of the SlingStudio recorded versions of those sources:
- Control-click the name of a track to disable the SlingStudio video tracks and enable the native source recordings.
- All SlingStudio live-to-tape edits, lower thirds, graphics etc. transfer automatically to the new high quality native source recordings.
Important to reiterate:
- The source device with the higher quality video must correspond to one of your SlingStudio project's recorded inputs.
- Both the SlingStudio recording and the higher-quality recording must have identical audio. (Otherwise the SlingStudio import extension won't be able to match and swap the video.)

