To work with the Audio Mixer:
- With your SlingStudio device powered up and ready to go, launch the Console app on your iPad.
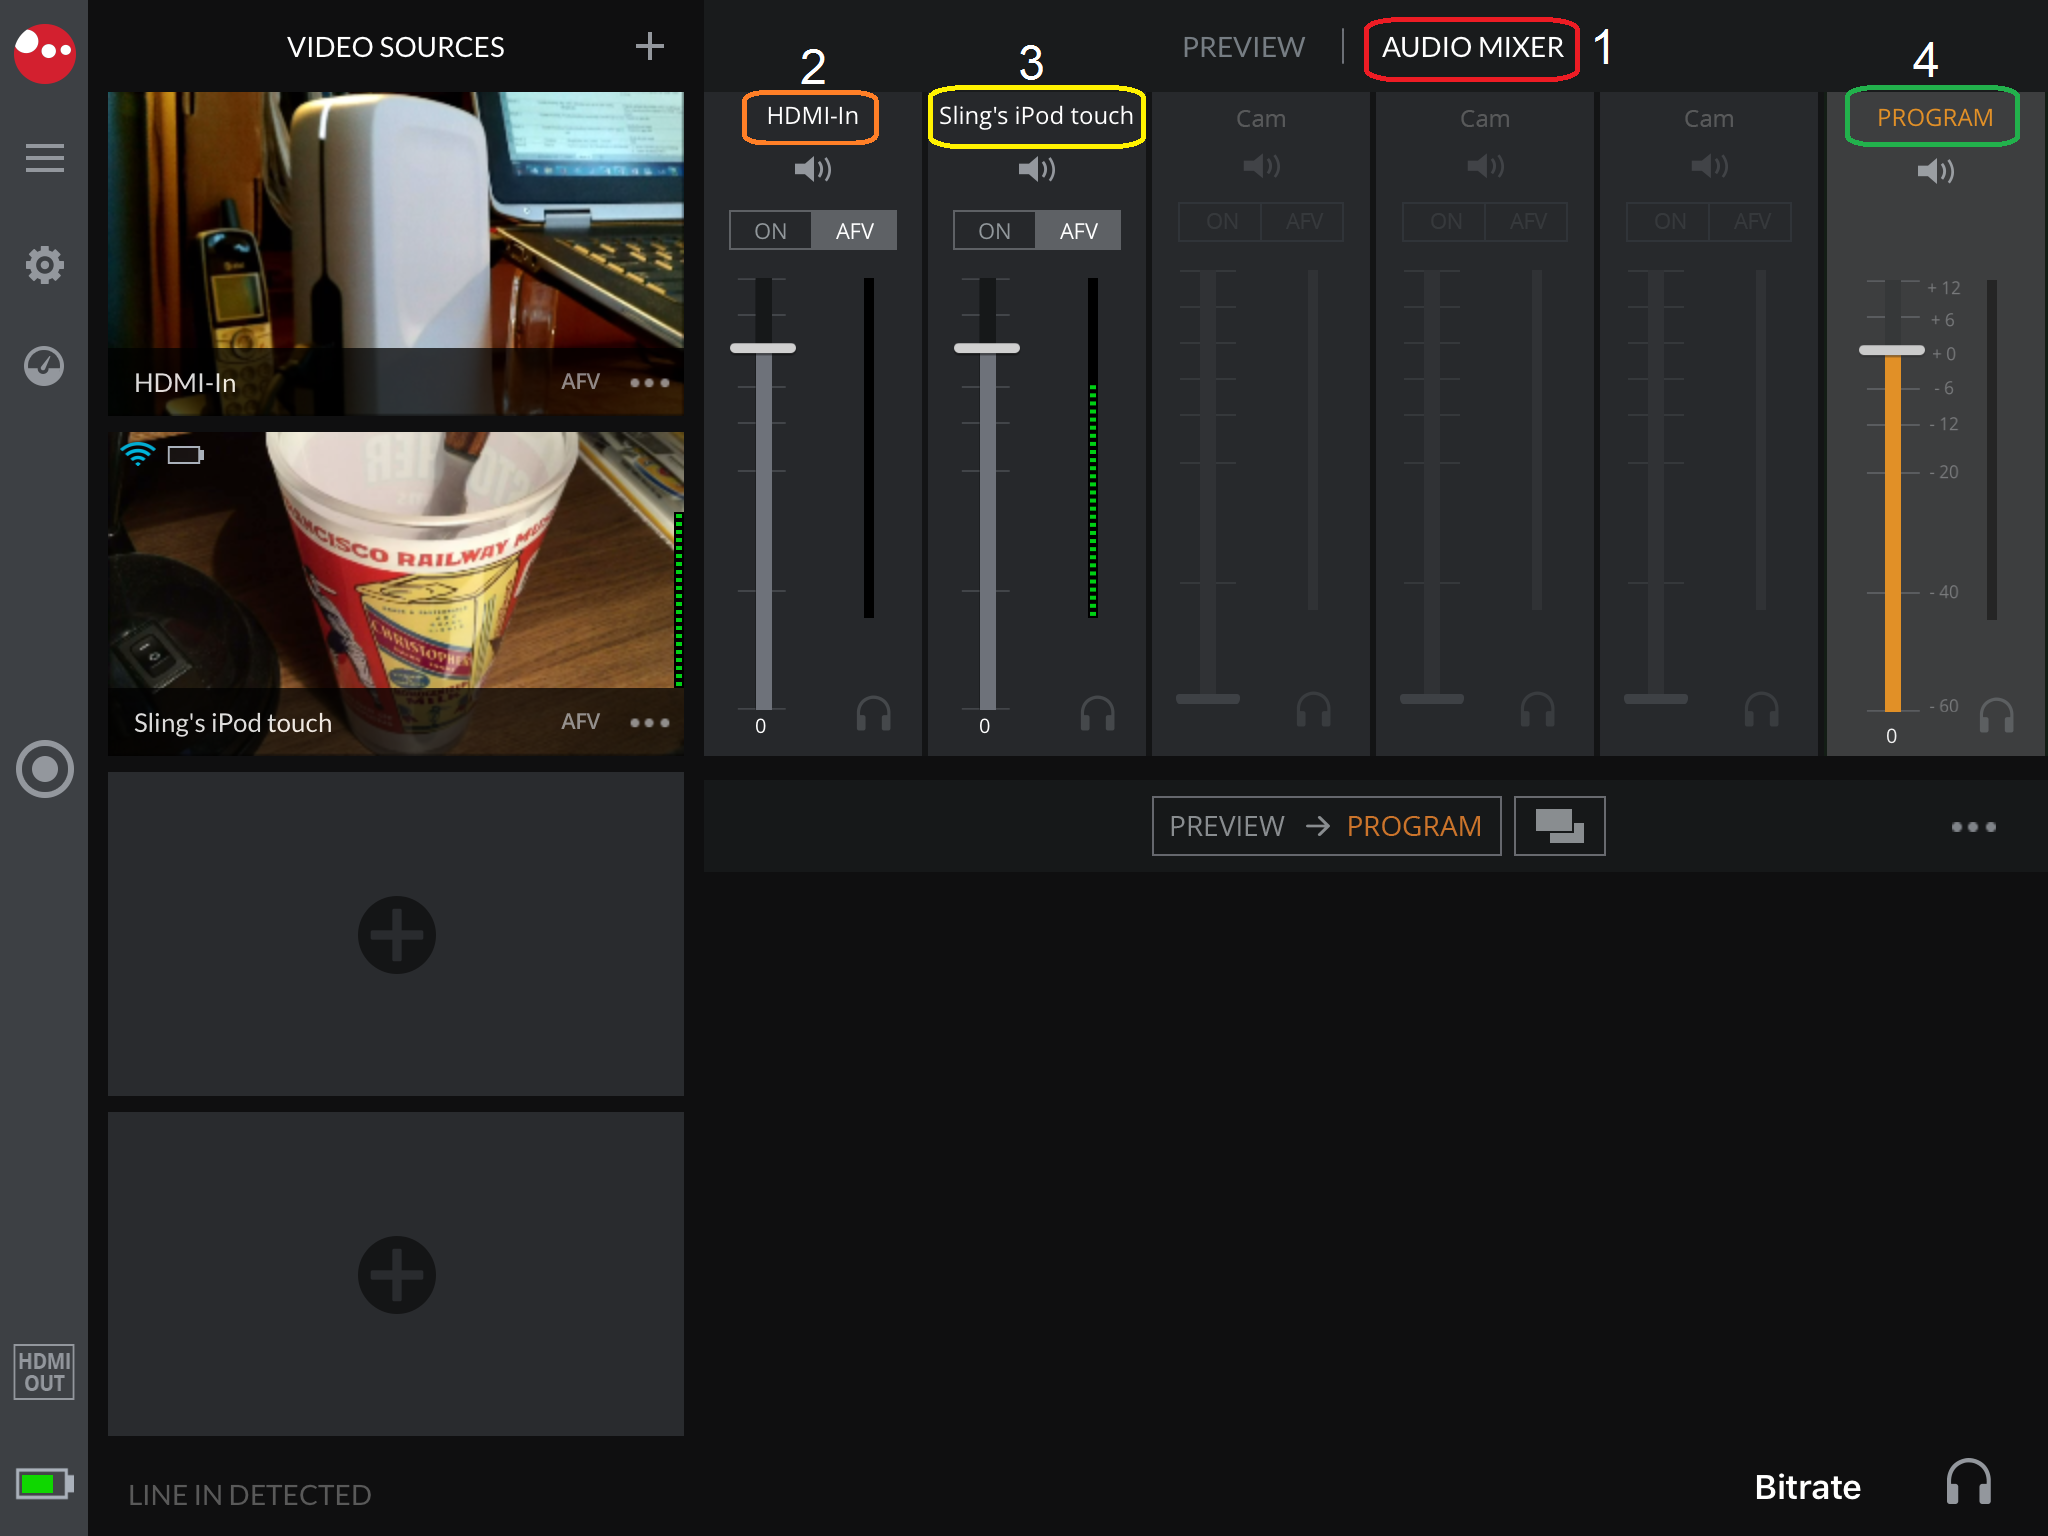
- The Console app allows you to see either the Preview screen, or the Audio Mixer. Tap Audio Mixer (circled in red in the image below). You see the Audio Mixer controls. (Not shown: Controls for a direct line-in, which are a bit different.)
What do the parts of the Audio Mixer do?
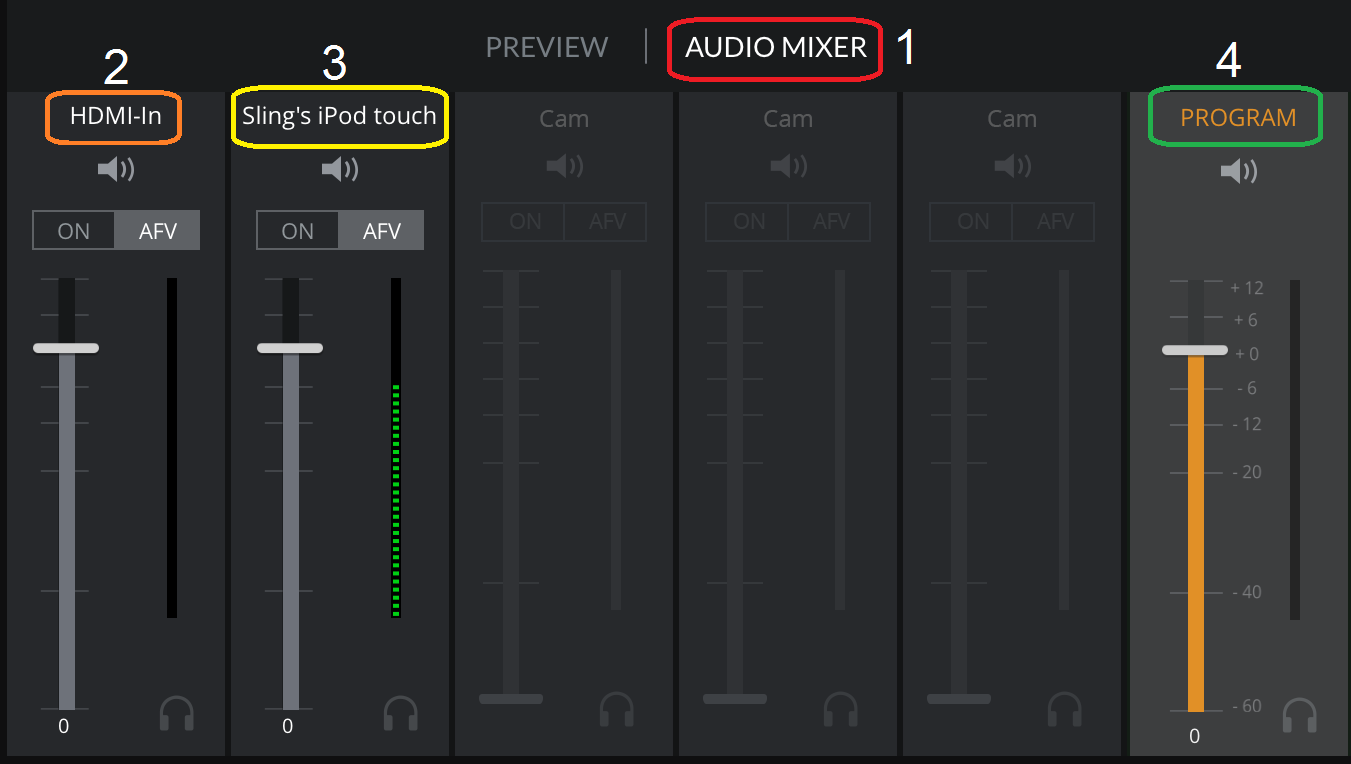
| Item | What it is | What it does |
| 1 | Preview/Audio Mixer toggle | Allows you to choose between the Preview screen and the Audio Mixer. |
| 2 | HDMI source audio | You can: - Mute/unmute audio from this source (tap the speaker icon)
- Choose whether audio is ON all the time, or uses AFV (audio follows video), which ensures that the video that's currently "live" is coming from the currently-selected video source.
- Control the input volume with the slider controls. The volume meters help you modulate the audio input volume properly. Try to get the volume up fairly high, without allowing it to regularly hit the peak (overmodulate).
- Monitor audio via the iPad speaker by tapping the headphone icon. (Caution: This can cause severe feedback if the iPad is near the video source's microphone.) Note that toggling the headphone icon to monitor audio doesn't change the muting/unmuting of source audio going into the program. To control that, tap the speaker icon.
|
| 3 | Capture app source audio | Same as for HDMI source, above. |
| 4 | Program audio | You can: - Mute/unmute audio for the Program (tap the speaker icon)
- Control the input volume with the slider controls. The volume meters help you modulate the audio input volume properly. Try to get the volume up fairly high, without allowing it to regularly hit the peak (overmodulate).
- Monitor audio via the iPad speaker by tapping the headphone icon. (Caution: This can cause severe feedback if the iPad is near the video source's microphone.) Note that toggling the headphone icon to monitor audio doesn't change the muting/unmuting of source audio going into the program. To control that, tap the speaker icon.
|
Note that, by default, the audio mixer setting for any of these is AFV mode:
- HDMI source
- CameraLink (wireless)
- Capture app (wireless)
Meanwhile, by default, the audio mixer setting for any Line-in connection is Always On mode.
Therefore, if there is a Line-in connection, by default it is the program audio unless you mute it by tapping the speaker icon.

